How To: Quickly Turn on 'Do Not Disturb' in iOS 12 Until You Change Locations
One of the new iOS 12 features for iPhones is an enhanced version of Do Not Disturb mode. Instead of being limited to times you manually input, Apple added new ways to manage the feature, including activating it based on location. For those on the go, this can be done pretty quickly.By setting Do Not Disturb using your location, you can make sure you're free from the distractions of your iPhone while you are at a particular place. Whether at an event for your child, visiting family for the holidays, or out on a date, when a specific time frame isn't predetermined, location-based activation is key. Once you leave, you won't have to remember to turn Do Not Disturb off anymore, as iOS 12 will handle it automatically.Don't Miss: 100+ Cool New iOS 12 Features You Didn't Know About for iPhone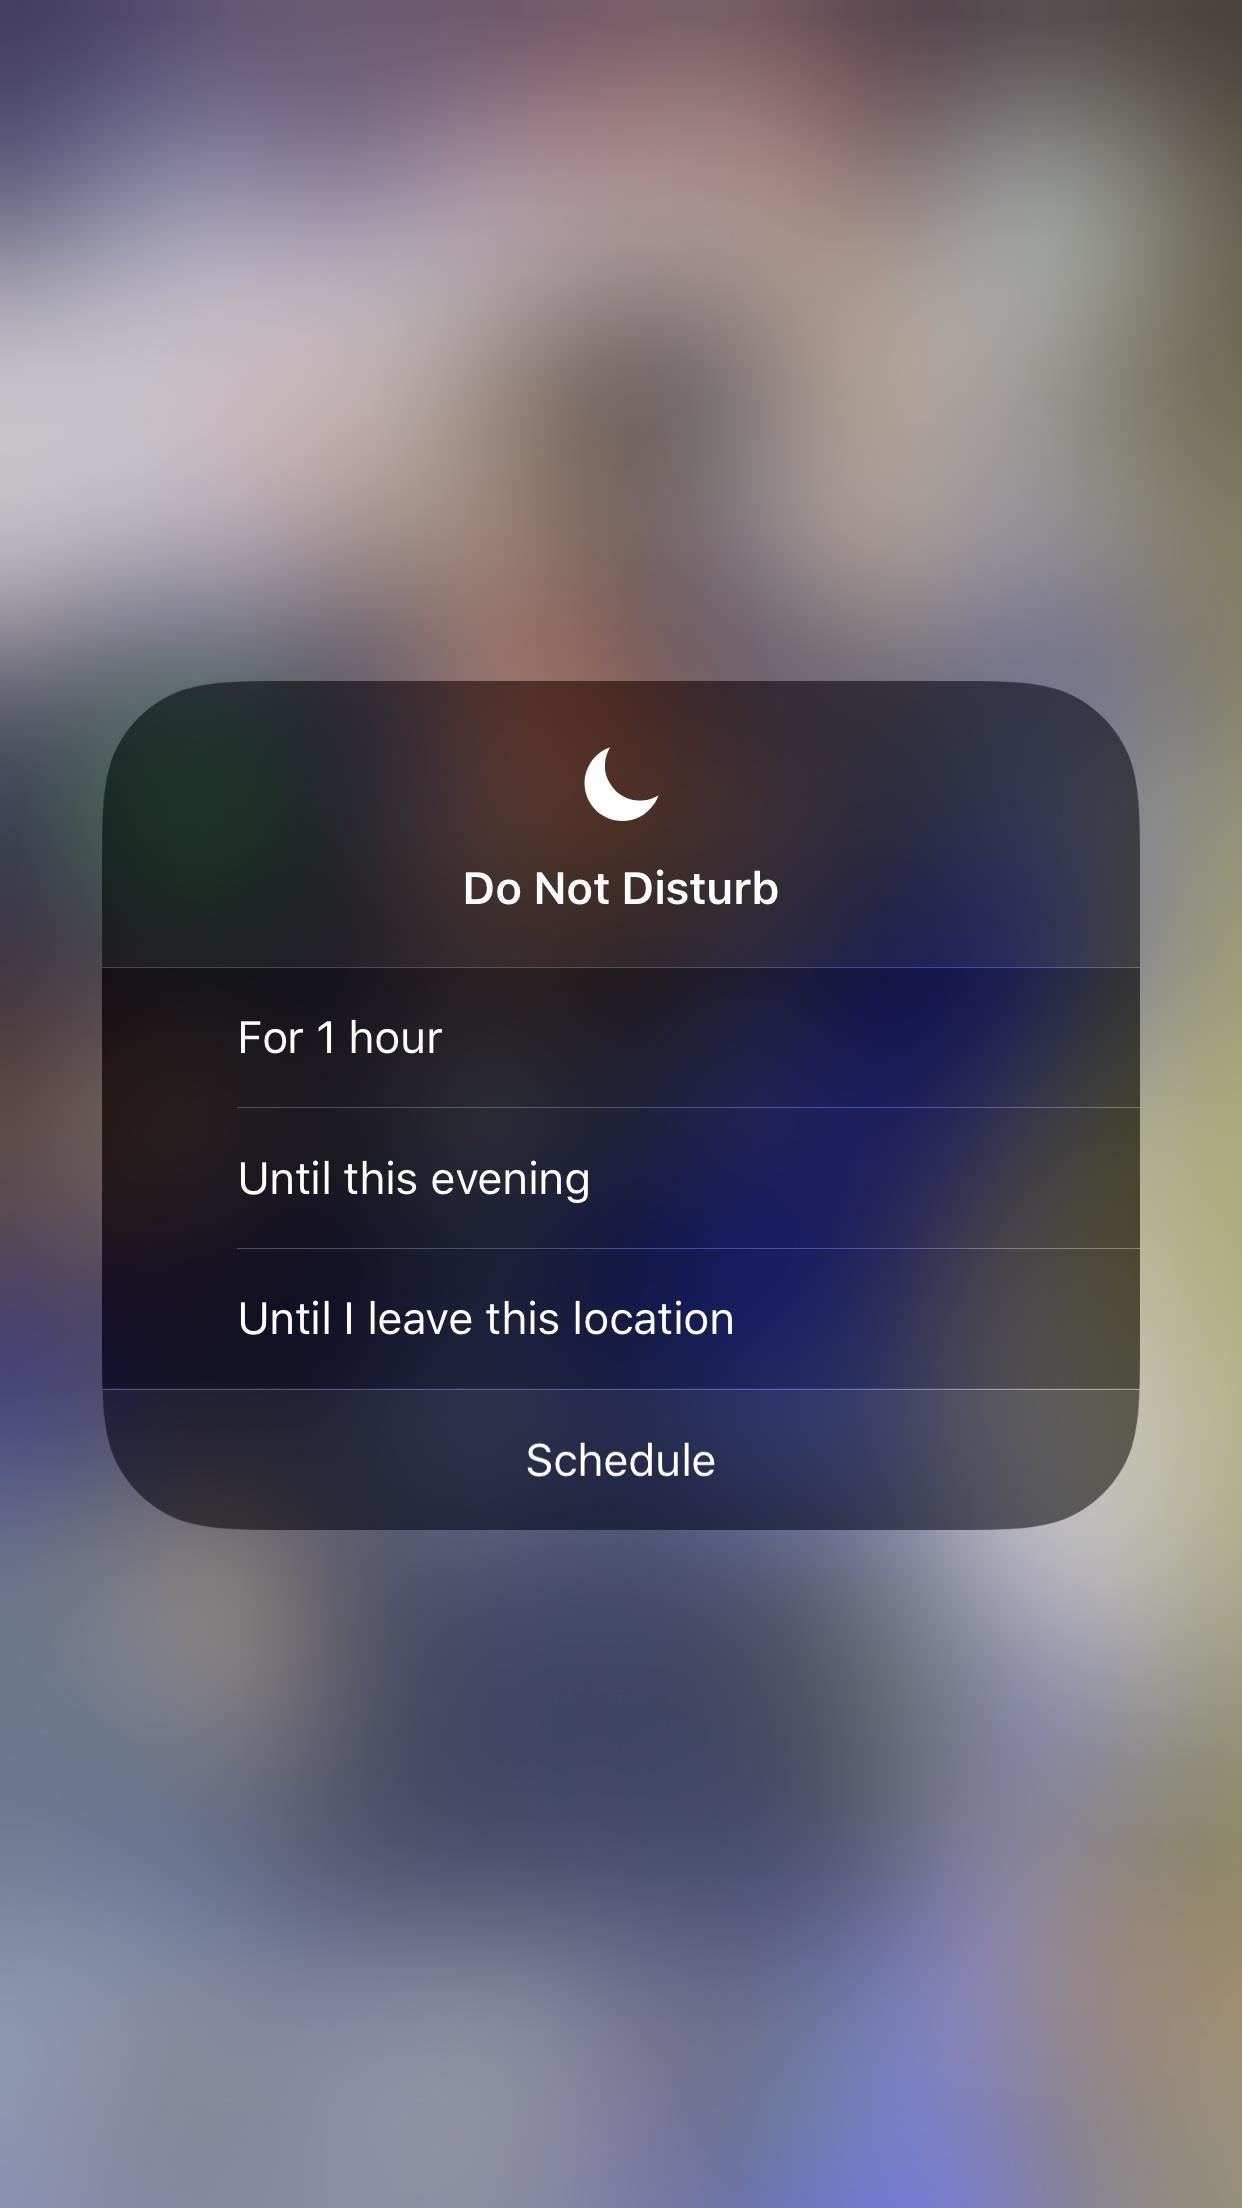
Enabling Do Not Disturb for Remaining Time at LocationFirst, make sure that Location Services are turned on by opening your Settings app, then choosing "Privacy." Select "Location Services," and enable the toggle. Second, if you haven't already added the Do Not Disturb toggle to your Control Center, make sure you do so.Open the Control Center swiping up from the bottom of the display or by swiping down from the top-right corner on iPhone X or newer device. Next, 3D Touch the moon-shaped Do Not Disturb button (or long-press if you're using an iPhone 6 Plus or older). This will reveal a few options, and among these is "Until I leave this location." Your iPhone will display its reading of your current location underneath this option.Once selected, the icon will change to purple, indicating Do Not Disturb mode is activated — your iPhone will now be silenced until you leave your current location. Depending on your Do Not Disturb settings, this means calls and notifications will either be silenced entirely or only when your iPhone is locked. As you'll notice, you can also use this 3D Touch (or long-press) gesture to quickly enable Do Not Disturb mode for one hour or until later in the day.With these new Do Not Disturb features and a handful of others, Apple is protecting your digital wellbeing, making it easier to enjoy moments without constant distractions from your phone. Another great example of this is the new Bedtime Mode feature, which makes your mornings less stressful after waking up.Don't Miss: Use Bedtime Mode to Keep Notifications from Distracting You at Night on iOS 12Follow Gadget Hacks on Facebook, Twitter, YouTube, and Flipboard Sign up for Gadget Hacks' daily newsletter or weekly Android and iOS updates Follow WonderHowTo on Facebook, Twitter, Pinterest, and Flipboard
Cover image and screenshots by Jon Knight/Gadget Hacks
Have one of the jackass guys think the skit is to go tandem skydiving with a funny costume on but the real prank is right as the jackass guy and the skydiving instructor jump out of the airplane the skydiving instructor says, "oh shit" and pretends their was a malfunction with the parachute that they're not deploying and then when they get close enough that they need to deploy it he deploys it
Gadget Hacks News — Page 52 of 55 « Gadget Hacks
Qi Explained: The Best Wireless Chargers for Your New iPhone X, iPhone 8, or iPhone 8 Plus How To: Are Your Chargers Faulty or Slow? Here's How to Test Them on Android News: The Best Black Friday 2018 Deals on Wireless Chargers for Your Phone
How to fix a Samsung Galaxy S9 Plus that is charging very
News: Google Unleashes the Powers of Childish Gambino aka Donald Glover in AR via New Pixel Playmoji How To: How Google's Titan M Chip Makes the Pixel 3 One of Most Secure Android Phones News: Google Pixel Reviews Are Out—Here's What People Are Saying
Google's ARCore Will Do for Android Hardware What Apple's
In order to make a retro wireless handset, you will need the following: vintage handset, a momentary switch, a resister, a Blue tooth headset, wires, a drill, and a blue LED and mount. Disassemble the blue tooth head set. Then, disassemble the handset. Remove all of the wires and the base. Snip the white wires. Drill a hole in the earpiece.
Retro Wireless Handset | Make: - makezine.com
How To: Enhance the Music Listening Experience on Your Nexus 7 Tablet How To: Make LEDs Dance to Techno Music How To: Control Music Using the Power & Volume Keys When Your Nexus 7's Screen Is Off How To: Make Trippy EL Wire Headphones That Dance to the Beat of Your Music
Light Up Your Next Party with This DIY LED Beer Pong Table
Use these tips to help you master the iPhone XS, iPhone XR and iPhone X — from how to navigate the devices to getting the most out of their new features.
iPhone XS, XS Max and XR: 27 tips and tricks to master Apple
Wonder How To is your guide to free how to videos on the Web. Search, Browse and Discover the best how to videos across the web using the largest how to video index on the web.
Sarah Tseggay's Profile « Wonder How To
MAKING THIS "ROM" INSTALATION YOU WILL BE USER "ROOT" DONT NEED ANY "ROOT" PROCESS. Disclaimer: As with any computer-related procedures, there is a risk that your device may malfunction or even break.
How to root a Nook Color to transform it into an Android tablet
So the problem probably occurs during the transfer from iTunes to iPhone. The user manually syncs ringtone with iTunes, so he/she is able to select the ringtones they want to sync. iTunes will sync media files together in one sync, when users sync ringtones to iPhone, they will get music synced as well.
Starting on Android 4.2, a new feature called Quick Settings was integrated into the Notification tray, which allows you to quickly turn on and off certain device features such as Wi-Fi, Bluetooth, GPS, etc.
How to Monitor Your Kid's App Usage on Android « Nexus
How to calibrate your TV to get the best picture possible A few simple adjustments can help your TV produce a more accurate picture. We'll show you how.
how to change color saturation on monitor - Microsoft Community
0 komentar:
Posting Komentar