How To: The Definitive Nexus 7 Guide to Bootloader Unlocking, Rooting, & Installing Custom Recoveries
Rooting, bootloaders, custom ROMs, CyanogenMod, ClockworkMod... it's all pretty confusing, isn't it? You're not the only one having trouble with this. Many users in the Nexus 7 SoftModder forum have been scratching their heads at these many terms.First, let's cover the terms, so we can get that out of the way.
The Most Frequently Used Terms You NEED to Knowbootloader: A bootloader is what tells your Nexus 7 what things to load when you first turn it on. Think of it as a set of instructions for what switches to be switched on and in what order. Unlocking bootloader: Unlocking a bootloader is allowing your Nexus 7 to load or switch on whatever it wants when it boots up. Bootloaders come locked out of the box to prevent unwanted tinkering; unlocking it will allow for custom ROMs on your Nexus 7. Rooting: Rooting is gaining access to parts of Android you normally not allowed in. Think of it as kicking down doors at the office that say "Restricted: VIPs Only". Once rooted, your Nexus 7 can run cool and innovative apps that require all doors to be opened to work. Custom recovery: Used to install custom ROMs on your Nexus 7. It's also used as an option to restore your device to stock when things go awry. It's the most used tool in custom ROMs. Popular custom recoveries are ClockworkMod (CWM) and Team Win Recovery Project (TWRP) which uses a touch-only interface to install ROMs, making it a super easy process. Flashing: Flashing is simply the process of installing a custom ROM (or even a stock ROM) onto your device. Whew! Okay, now you know that basic terms. Great!
Breaking Free of Your Stock Android SystemSo, now how can you finally break free from your stock Android OS on your Nexus 7 and explore the ultimate customization options available?The rest of this article will cover how to get the most out of your Nexus 7 tablet and guide you through the process of prepping your Nexus 7 for custom ROMs using a Windows computer. Adding a custom ROM onto your Nexus 7 will increased speed, give you better performance, and more. So, let's begin!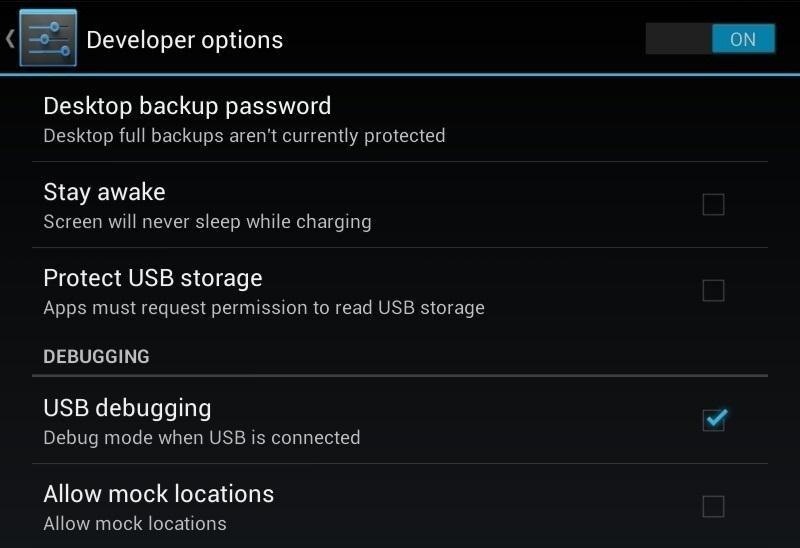
Step 1: Enable USB DebuggingBegin by enabling "USB debugging" on your Nexus 7. This is the most important step because the toolkit will automate everything for you. Enable "USB debugging" by going to Settings -> Developer Options -> USB Debugging. Note: If there is no "Developer Options" shown in "Settings" menu, you can unhide it by going to Settings -> About Tablet -> Build Number and tapping on that 7 times to unlock it. This is something Google started implementing in Jelly Bean 4.2 and higher.Once enabled, plug your Nexus 7 into your computer using the USB cable that came with your tablet. Don't remove the USB cable from your Nexus 7 unless the toolkit tells you to do so later.
Step 2: Toolkit Time!On your PC, begin by downloading the Nexus 7 Root Toolkit. Install the toolkit by clicking "Next" through the various prompts.Once the installation is complete, go ahead and run the toolkit. A window will pop up asking for your device model. Choose your device from the list along with its OS version and click "Apply". Head over to "Initial Setup" and click "Full Driver Installation..." Follow the guide provided in the toolkit to install the required drivers for your Nexus 7. I recommend "Driver Solution #3", but any of the three options should work. The toolkit has a built-in guide with pictures that will aid you in installing the drivers. Now with the drivers installed, make sure they're working by testing them over in the "Step 3" tab. The toolkit will verify if the drivers are properly installed and working.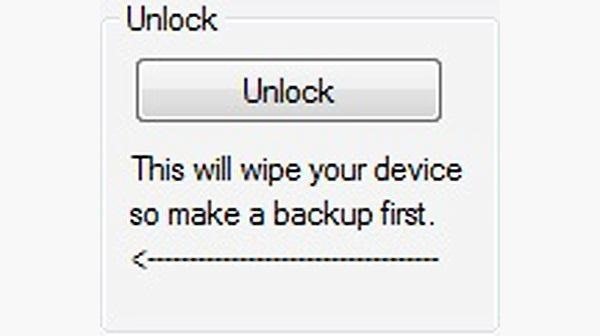
Step 3: Unlocking the BootloaderClick on "Unlock" to unlock the bootloader. Everything will be automated, so just follow its lead. THIS DELETES EVERYTHING ON YOUR NEXUS 7—back up everything important.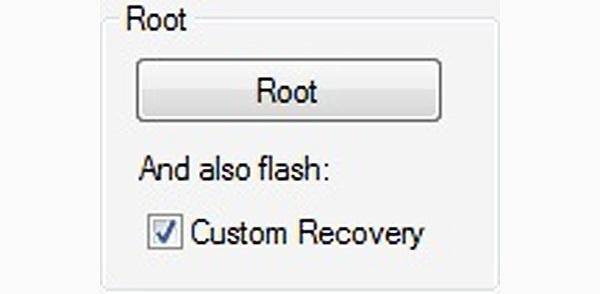
Step 4: Rooting and Custom RecoveryWith the bootloader unlocked, head over to "Root" to root your tablet. Check the option for "Custom Recovery" to have TWRP installed. Then click "Root" to begin the process.
Step 5: Custom ROMsUsing a web browser on your PC, download the custom ROM you want to use. As an example, I will be installing the CyanogenMod ROM, but the process is the same for any custom ROM of your choosing. The latest version of CyanogenMod for the Nexus 7 can be downloaded from this page.CyanogenMod also requires Google Apps (GApps), so grab the latest version here.Now, let's head back over to the toolkit. With the toolkit opened up on your PC, click the button for "Launch" in Advanced Utilities. A very large list will pop up, but what you want to focus on is the section called "Flash Zips". Choose the option for "File is on this computer" and press "Flash zip...". A new window will open for flashing ROMs. Add the two zips files you downloaded earlier by clicking "Add zip's to flash...". CyanogenMod should be selected first, followed by GApps, so they flash in that order. With the files added, go over to "Wipe selected partitions..." and check the boxes for "Enable" including the boxes for "Data", "Cache" and "Dalvik".This ensures your old OS will be deleted before installing the new custom ROM. Click "Confirm operation" to begin flashing. Just sit back and let the toolkit automate the flashing process for you. Once complete, your Nexus 7 will boot up into the new custom ROM that was installed! You can now unplug the USB cable if you want.Here is CyanogenMod booted up for the very first time. Now, tell us if it worked for you!
May 11, 2015 · Flickr Now Compelling With Free Terabyte Of Photo Storage And Redesign Flickr mobile app will upload your phone's photos too. Massive storage. storing all your photos, Flickr also uses
Having Trouble Picking a New Phone? This Chart Will Help You
My Book: http
TextingStory Chat Story Maker on the App Store - iTunes
If you have the Rooted Samsung device or running the custom on your phone and want to unroot/restore stock rom on your device. Here is the easy guide to go back on stock rom. Rooting has lots of benefits which you can enjoy on your device, you can enjoy custom roms and other tweaks, but this will void the warranty of your device. To get back
How to Unroot and Restore Stock Firmware for Samsung Galaxy S4
How and why to use Bluetooth on your Windows 10 computer. Navigate to Devices and go to Bluetooth. Make sure the If you have come across issues using Bluetooth in Windows 10 and found a
How to Use Bluetooth Technology: 14 Steps (with Pictures)
You can edit and create new Google documents and presentations while offline. Offline spreadsheets are available in view-only mode. You must restore your Internet connection to make any edits or
How to View and Edit Google Drive Documents Offline
How to install iOS 13 beta 1 on your iPhone or iPad right now. Chris Smith @chris_writes. June 3rd, 2019 at 3:23 PM. Share Tweet.
How to Install iOS 10 Public Beta on iPhone / iPad
How to Troubleshoot & Fix Your Parents' Android Issues
One option being bandied about is the ability to unlock your phone simply by holding it up to your face. While hackers could easily find a photo of you, these cameras would offer more security since it requires a more robust, 3D model of your face to work. Crowds gather ahead of the launch of the iPhone 6 at an Apple store in London.
Your face might do more than just unlock the new iPhone
With the iPhone 8, 8 Plus, and iPhone X making their official appearance today, we take a look at the latest "revolutionary" features to determine how long they have already been found on Android.
10 iPhone Features Apple 'Shamelessly Copied' from Android Phones
With the announcement of the Shellshock Bash Bug, Linux admins around the world have been scrambling to patch their Bash shells so that they're no longer vulnerable to the exploit. If you have a Fedora, RHEL, or CentOS system that hasn't reached End-Of-Life, then updating to a patched version of Bash is as simple as: sudo yum update -y bash
Shellshock Bash Bug - Byteworks
If your iPhone issue is covered by the Apple warranty, an AppleCare plan, or consumer law, there's no charge. This does not include accidental damage, which requires a fee. If your iPhone has accidental damage and you have AppleCare+ coverage, you can use one of your accidental damage incidents to cover the repair.
iPhone 4 Screen Replacement Disassembly and Reassembly - YouTube
How to fix iPhone won't connect to App Store problems Can't connect to the App Store to download apps on your iPhone or iPad? Or are you having problems downloading an app or an update to an
Installing TWRP Recovery on OnePlus One. Installing of TWRP recovery is very easy if you've already spent time flashing recoveries, in case you haven't you'll learn it, because it is easy to
How To Install TWRP Custom Recovery On Any Android - YouTube
0 komentar:
Posting Komentar