How To: Automatically Back Up Everything on Your Android
NANDroid backups are one of the best reasons to root your Android device and install a custom recovery. They're essentially a snapshot of your phone's entire operating system and all installed apps, so if you ever screw something up when installing a flashable ZIP or custom ROM, you can restore your NANDroid backup to get everything back to normal.But performing a NANDroid backup is such a pain that we rarely do it, so a lot of times, the backups we have are extremely outdated. To help curb this issue, developer kantjer created a set of Tasker profiles that will automate this whole process—so after a bit of setup, you can sit back, relax, and let your phone back itself up on a set schedule.Don't Miss: Tasker for Beginners: Getting Started with Automation
What You'll NeedRooted Android device Custom recovery installed Tasker (free trial version available here) File explorer app capable of extracting ZIPs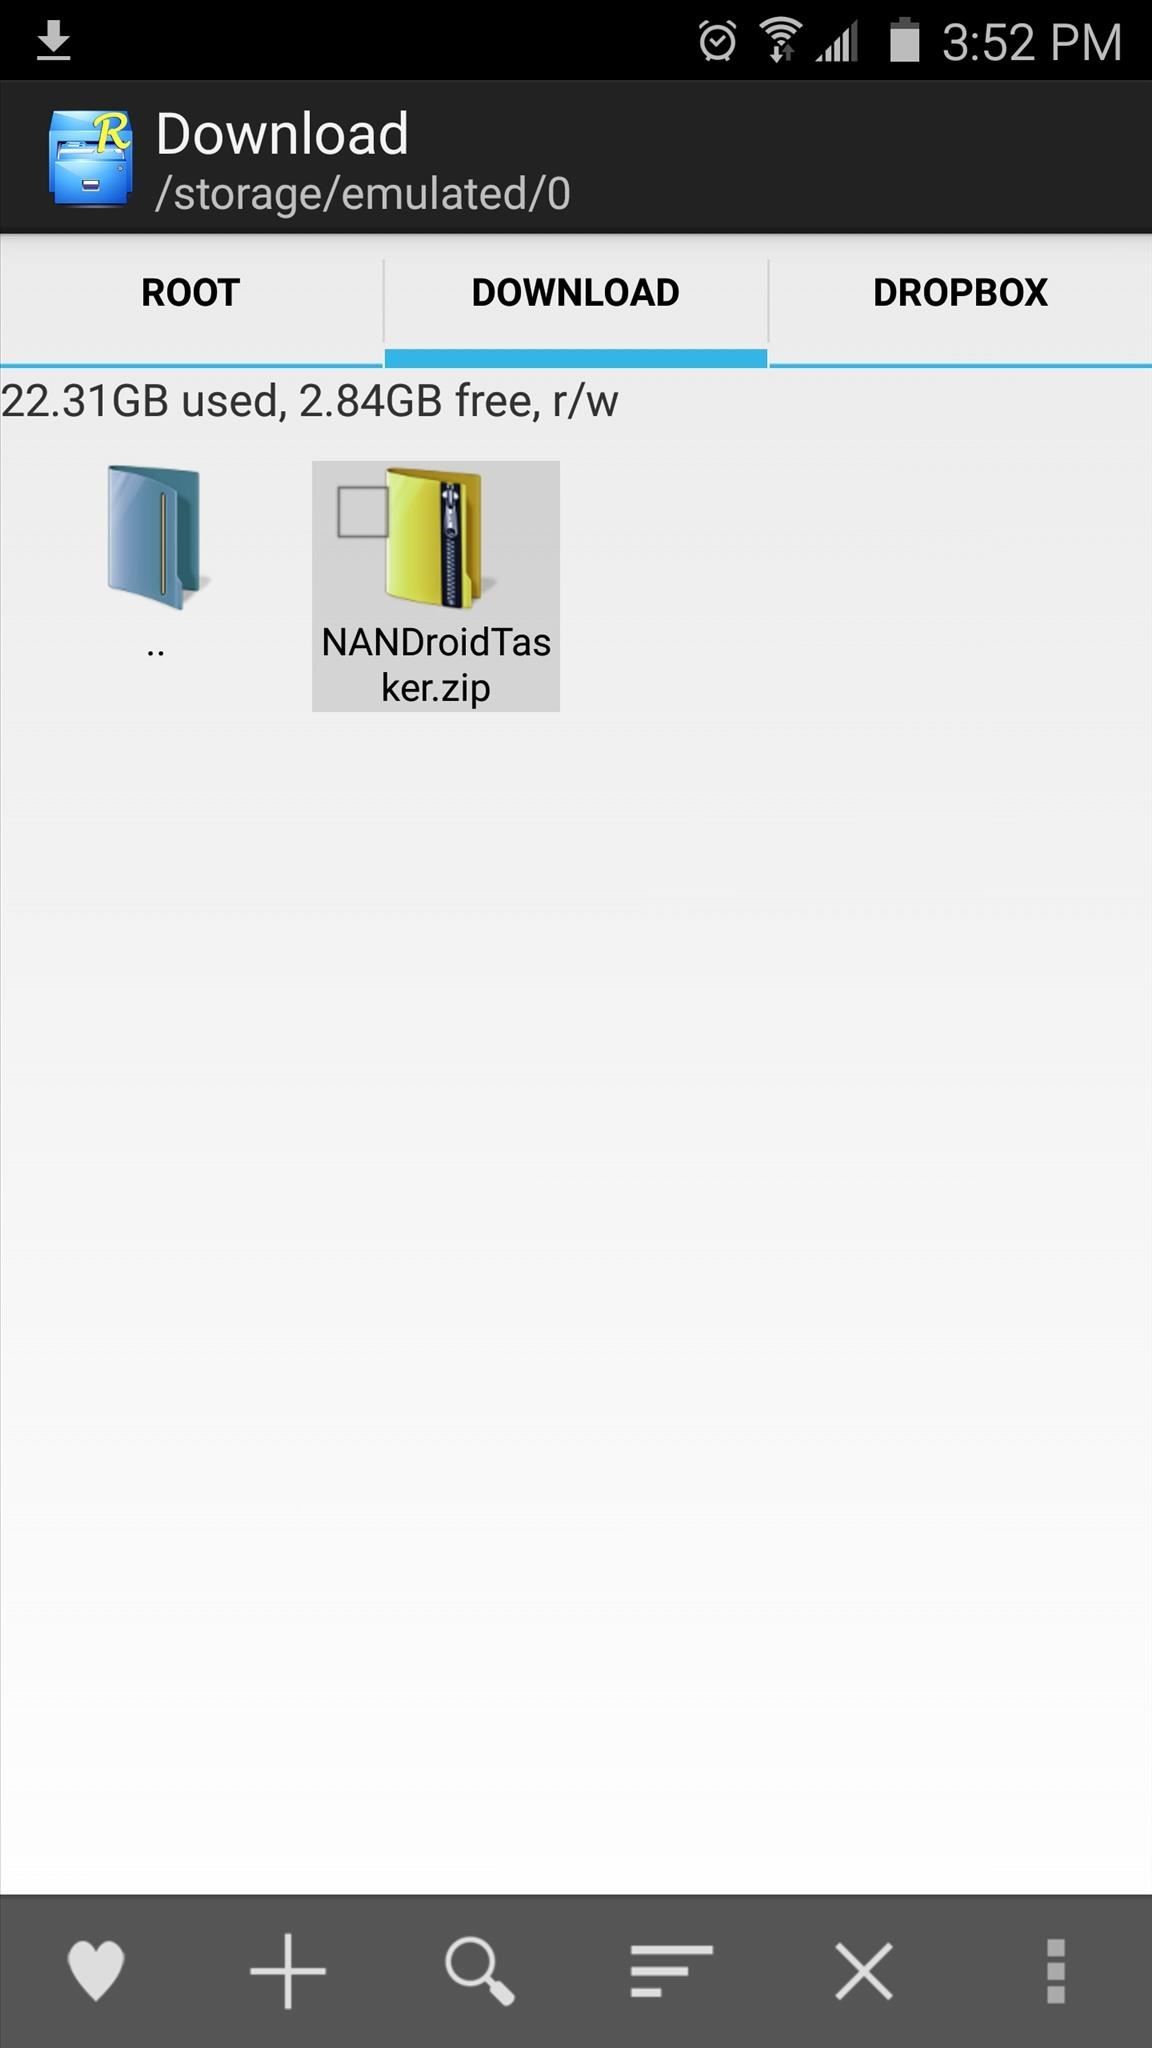
Step 1: Download & Extract the Tasker Profiles & TasksFirst up, you'll need to grab kantjer's Tasker profiles. To begin, point your device's web browser to this link, and a ZIP file containing the profiles should begin downloading immediately.Once you've done that, open your favorite file browser app with ZIP-extracting capabilities, then navigate to your device's download folder. From here, long-press the NANDroidTasker.zip file, then choose "Extract." Make note of the location where the files have been extracted, as this will come in handy later.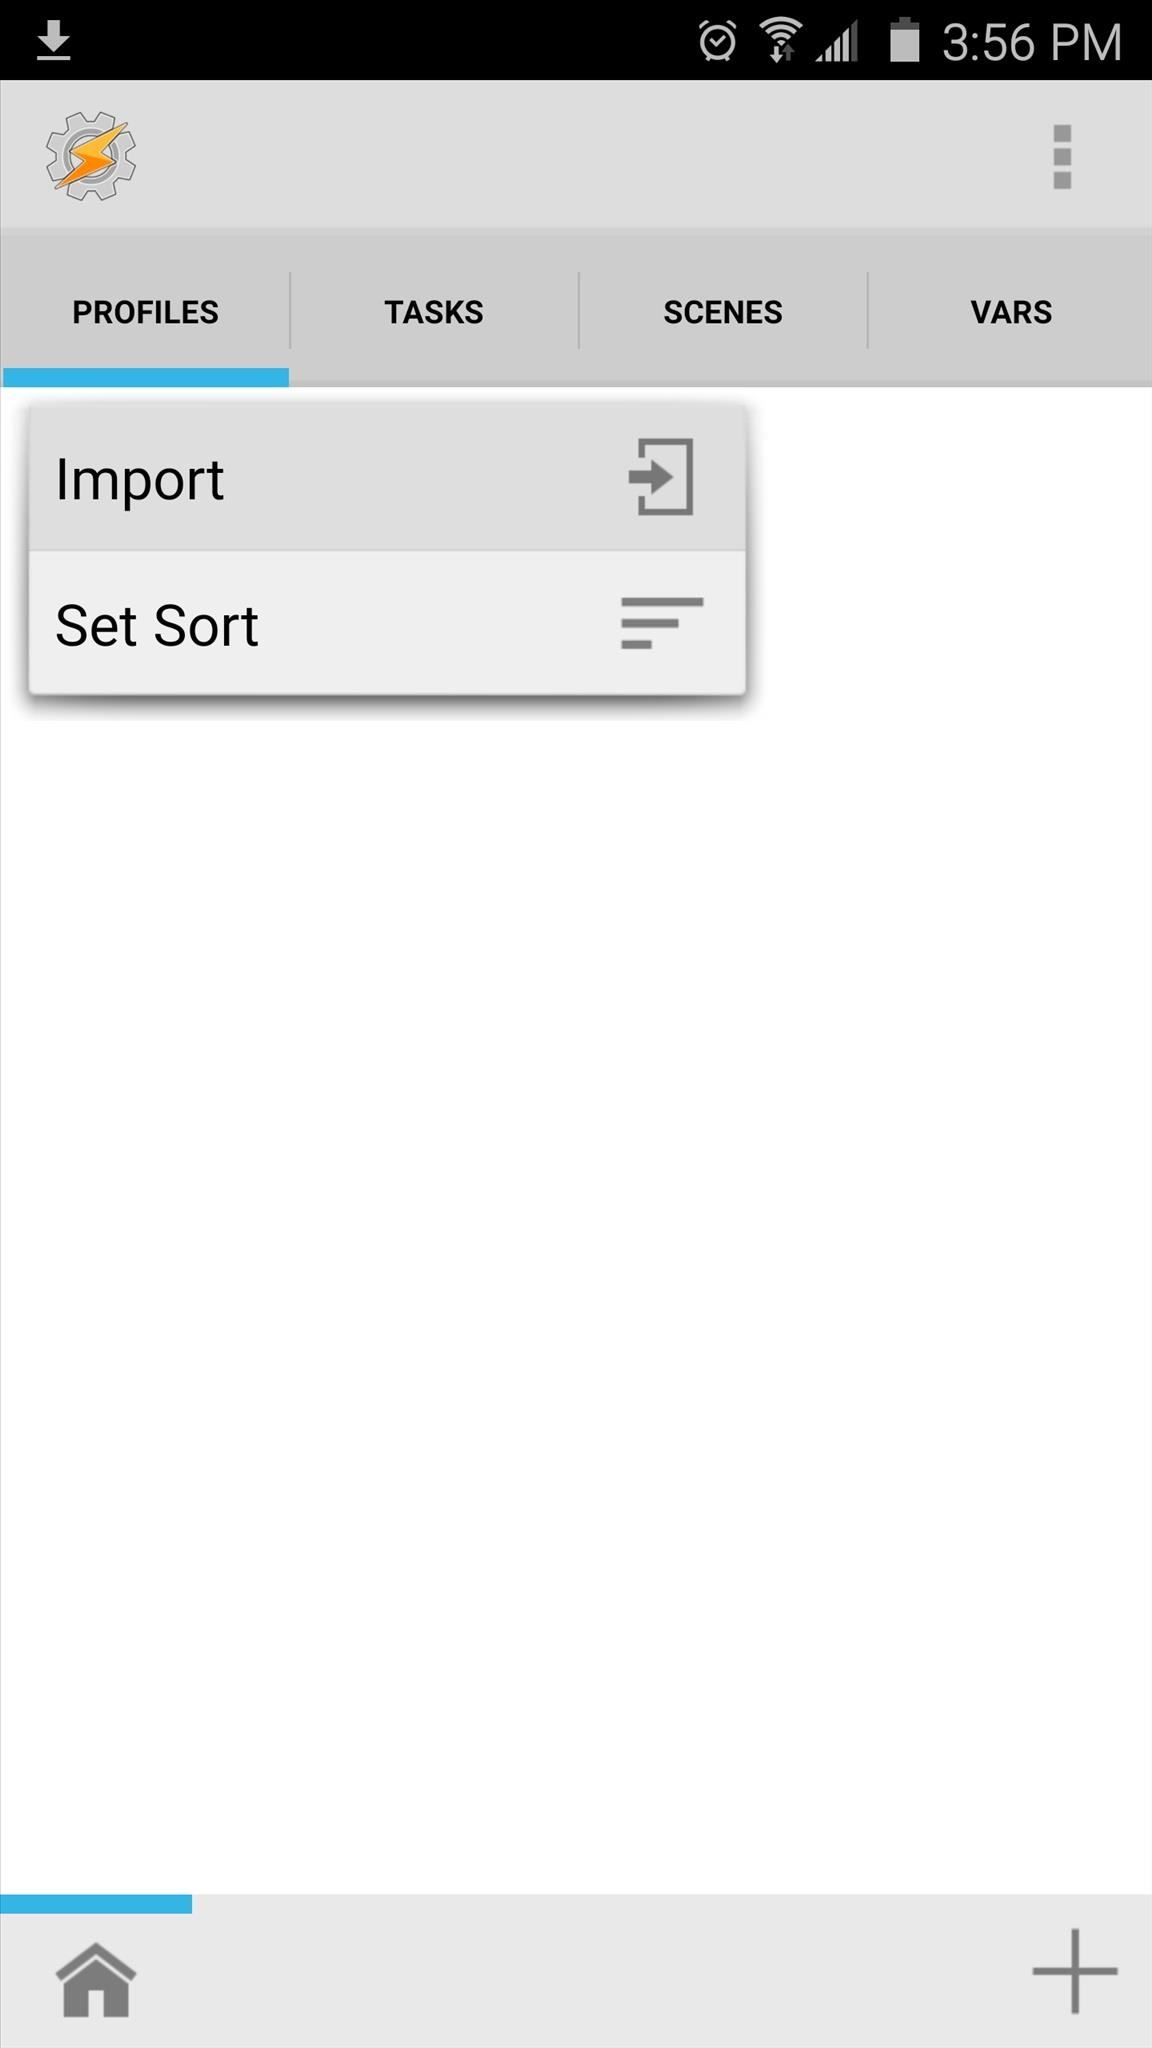
Step 2: Import the Profiles into TaskerNext, it's time to import the profiles you just downloaded. Starting at Tasker's main menu, tap the Profiles tab, then choose "Import" to begin. From here, tap the back button in the top-right corner of the screen twice to navigate to your main internal storage partition, then locate and select the first profile you extracted earlier. From here, repeat this same process for the second profile, and in the end, you should have two new profiles listed in Tasker's main menu. One is named "Nandroid backup" and the other is named "Nandroid retention."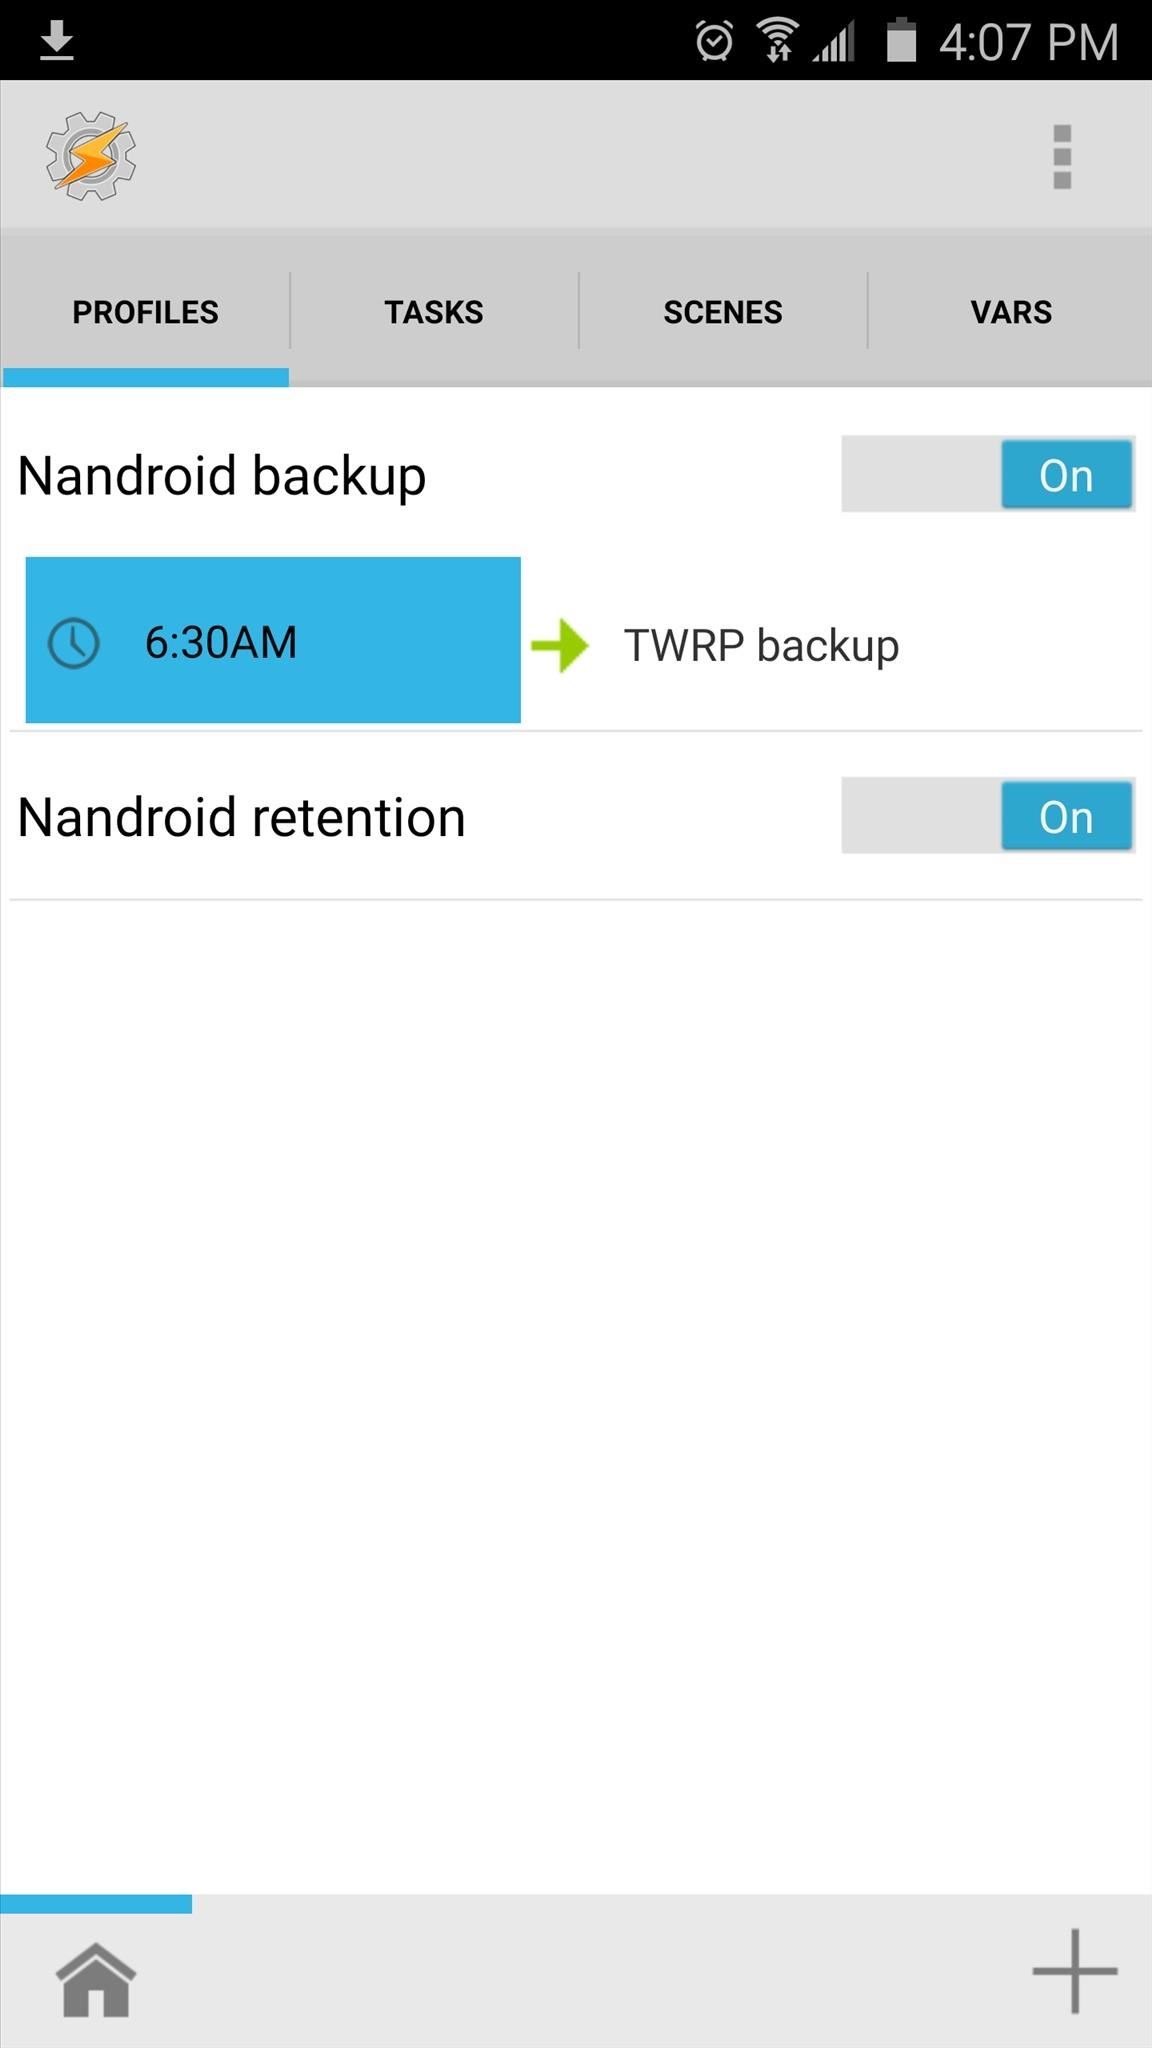
Step 3: Change Backup Schedules (Optional)By default, the scheduled NANDroid backups will take place every 3 days at 6:30 in the morning, and the profiles will automatically delete any backups that are older than the most recent three.If you'd like to change this, start by tapping the "Nandroid backup" profile in Tasker's main menu to fully expand it, then tap the "6:30AM" portion. From here, use the provided menu to set the time at which your scheduled backups will be performed. From here, if you'd like to change the interval between scheduled backups, head over to the Tasks tab from Tasker's main menu. Next, select the "TWRP backup" task, then tap the #1 action in the task. From here, change the value in the To field to the number of days you would like to wait in between scheduled backups. Finally, if you'd like to change the number of NANDroid backups to keep before the profiles automatically delete the old ones, tap the "TWRP retention" task. From here, tap the #1 action in the task again, then change the number in the To field to represent the number of NANDroid backups you would like to keep at any given time.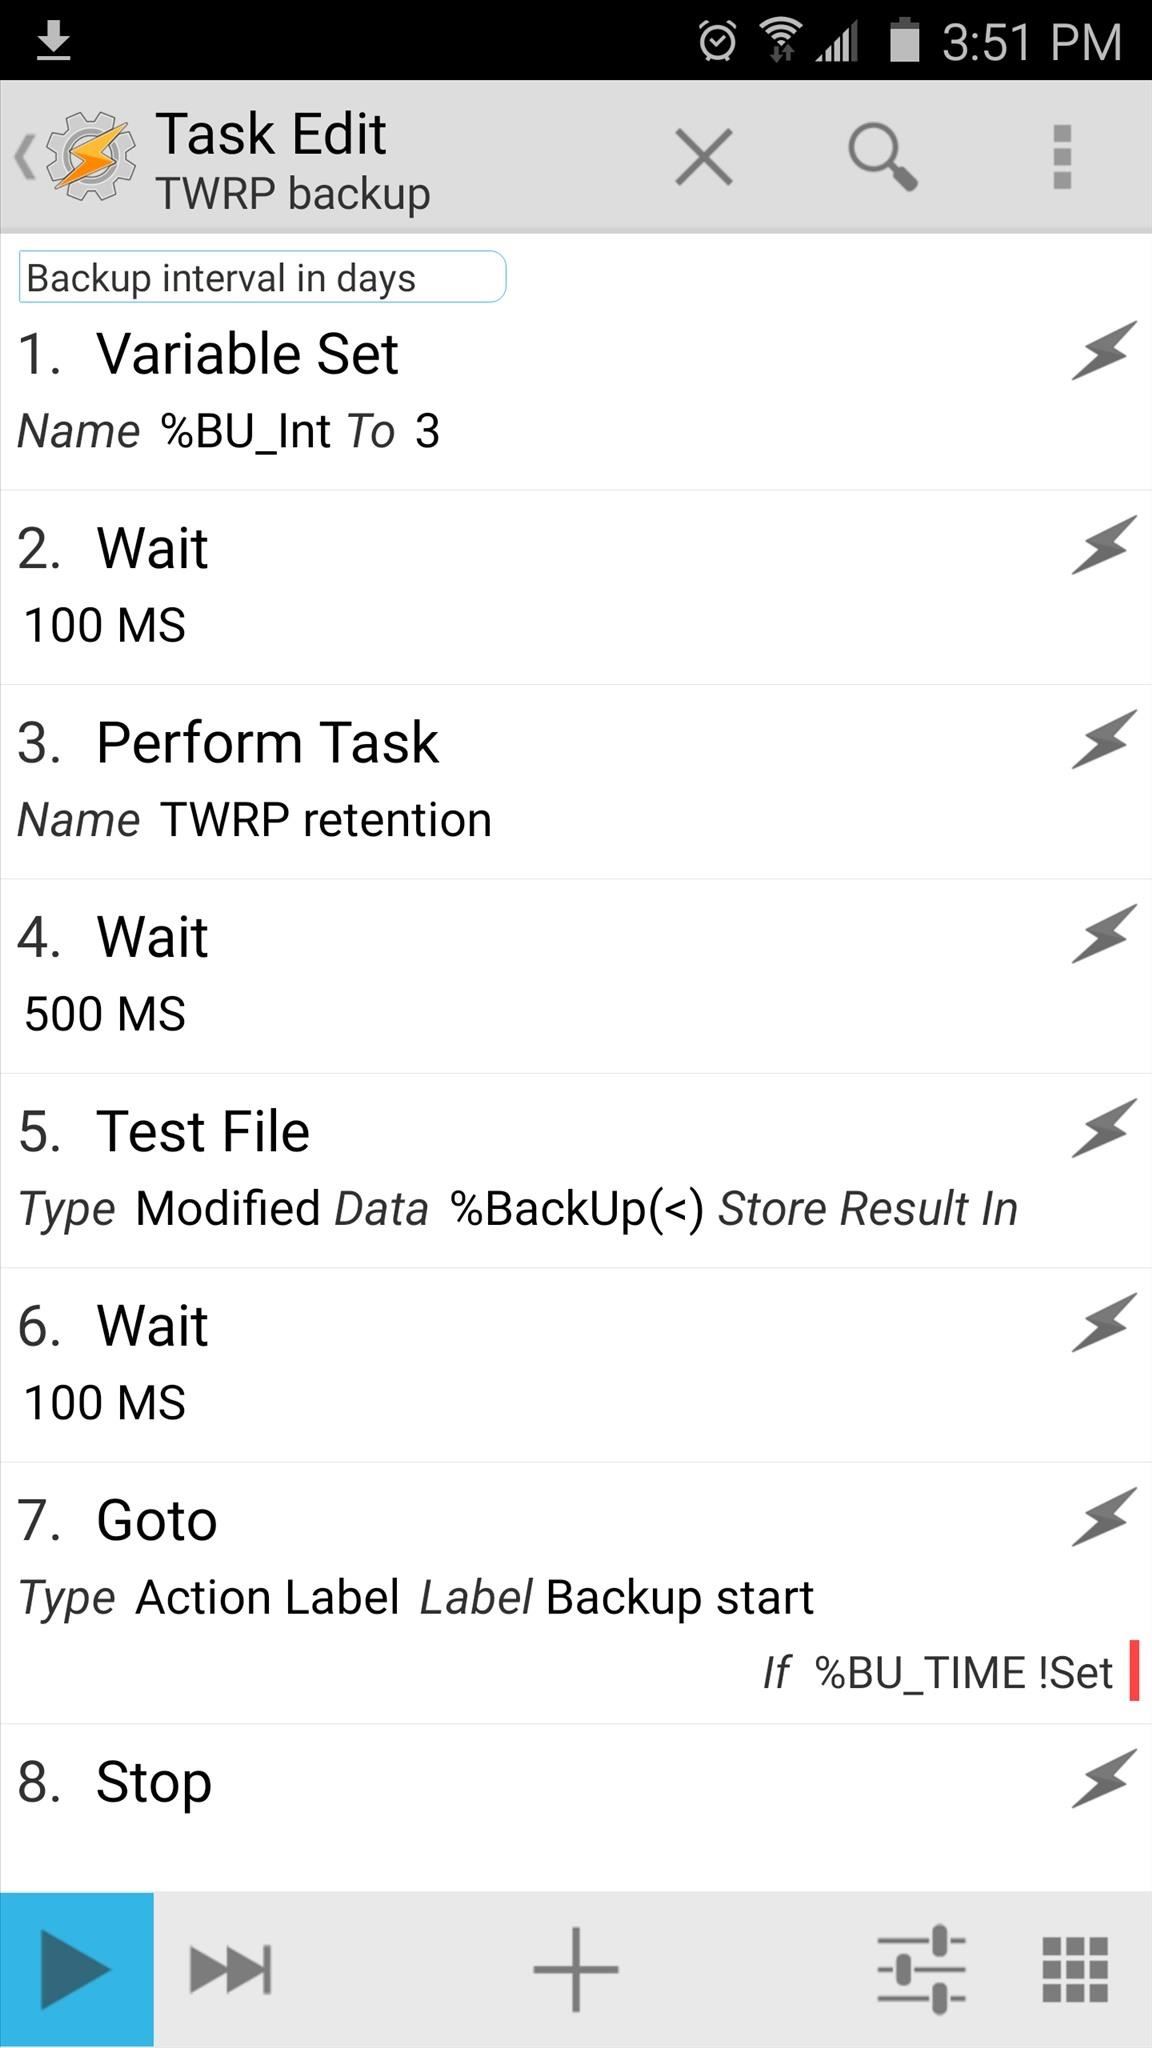
Step 4: Perform Your First Backup & Grant Tasker Superuser AccessNow that you have everything set up, you'll just need to run the TWRP backup task one time to make sure it's all working properly. From the Tasks tab in Tasker's main menu, tap the "TWRP backup" task, then press the play button in the bottom-left corner of the screen. Within a few seconds, Tasker should ask for Superuser access (if you haven't granted it already), so tap "Grant" on the popup. From here, your first automated NANDroid backup will start, and when it's done, your phone will automatically reboot. In the future, this will all happen automatically, so there's no need to come back into Tasker and hit that play button again.What intervals did you use for your scheduled NANDroid backup? How many backups did you decide to keep? Let us know in the comment section below, or drop us a line on Android Hacks' Facebook or Twitter, or Gadget Hacks' Facebook, Google+, or Twitter.
The long wait for the more affordable iPhone XR is nearly over. Following its mid-September announcement alongside the flagship iPhone XS and iPhone XS Max, preorders for the $749 XR begin on
11 tips til at forudbestille en iPhone XR, XS eller XS Max
Sony is coming up with new smartphone batteries, both lithium-sulfur and magnesium-sulfur, which will last up to 40 percent longer.
Sony's inventing a phone battery that could last 40% longer
How To: Get Better Quick Settings on a Samsung Galaxy S3 with This Fully Customizable Control Center How To: The Easiest Way to Get Android N on Your Nexus Before Anyone Else PSA: Enable This Hidden Setting Before Modding Anything on Android
How to charge Galaxy S10 battery? - Galaxy S10 Guides
Clear All Cache and Free Up Disk Space in Windows 7/8/10 Bijay Pokharel , 2 years ago 0 4 min read 78 Clearing the cache on your computer is (usually) a quick and easy way to help speed it up.
How to Free Up Disk Space and Clear All Caches in Windows 8
Pandora is an internet radio service that picks music for you based on your favorite songs and bands. With Pandora it's easy to create a never-ending playlist of songs to fit a certain mood, get recommendations for music you might like, and share your stations with friends. Best of all, Pandora is free to use on your computer and phone.
How to Add and share music with friends on Pandora Radio
Using BlackBerry Maps. A good place to start is to find out where you are on the map. Once you have fired up BlackBerry Maps, press the menu button to bring up the context menu. Select Find Location and the top entry should be Where I Am. Press this to get a map of your current location.
How to find your location using Google Map in Android old
Write your message. At the top of the page, tap Send . Tip: To add formatting, like bolding or changing the text color, select the text you want to format, then tap . Recall a message using Undo Send. Right after you send a message, you'll see the message "Sent" and the option to Undo. Tap Undo. Options for adding message recipients
How to Recall an Email in Gmail - Solve Your Tech
On your computer, go to drive.google.com. Right click the Google Docs, Sheets, or Slides file you want to save offline. Turn on "Available offline." To save multiple files offline, press Shift or Command (Mac)/Ctrl (Windows) while you click other files. Preview offline files. On your computer, go to drive.google.com.
Work on Google Docs, Sheets, & Slides offline - Computer
How to Install the Moto X Camera - Note 2 (Android) Full Tutorial:
How to Protect a touchscreen device against rain (cheaply
Live Snap Love | Photography Tips | Take better pictures of your family, their children, and the world around you. Grab the 90 day Learning blueprint! www
In the book, "How To Disappear Completely and Never Be Found" by Doug Richmond, he suggests the following… Search for babies who died the day you were born and contact the government requesting their birth certificate. He emphasizes that this is normal because people lose birth certificates all the time.
How To Make Yourself DISAPPEAR! - YouTube
Resize images with Automator Mac Tip #280/14-March-2007. A friend recently complained of tedious amounts of time spent resizing photos and screenshots, which led me to explain how Automator can help. I mentioned Automator back in Automate It, Tip #195/11-May-2005. I have a Finder folder of photos from my digital camera.
How To Resize Images Automatically Through Mac Automator
makewebworld.com/resize-images-mac-automator/
This is very Good Tutorial For me and Apple Mac is not a simple to use You Solve my Problem Thank you so much now i m able to resize my picture using the Aumomator Option with my Mac System.I have Gaming Site so lots of picture want to resize it and save need to much time surf but now feel relax after to read this post my feeling is very high you save my time with this tip thank you again.
Don't Have Photoshop? Use the Free Web Tool Cropp.me to Crop
Depending on how you use your phone, you may have noticed your status bar is a bit crowded due to various icons being enabled. While some icons make sense to have, such as Wi-Fi and Bluetooth, the VPN key icon can be redundant, especially if the app uses a notification.
How to Customize the Status Bar on Android (Without Rooting)
0 komentar:
Posting Komentar