How To: Root Your Samsung Galaxy S7 or S7 Edge (US Models)
The international, Exynos-powered Galaxy S7 and S7 edge have had a working root method ever since a few days after release. But the North American variants—those using Qualcomm's Snapdragon 820 processor—have locked bootloaders, and have proven to be almost unrootable up until now.Don't Miss: How to Root Exynos Variants of the Galaxy S7 & S7 EdgeDeveloper br3w3r has stepped in to claim a root bounty worth nearly $2,000, and as a result of his work, SD820 versions of the Samsung Galaxy S7 and S7 edge can now be rooted. The process adds an extra step or two to traditional root methods since it relies on an engineering boot image, but those of us with AT&T and T-Mobile versions of the phone can finally step up to Superuser status.
Before You BeginFirst up, be aware that this root method is in its early stages of development, so there are a few bugs and quirks. As a result of these issues, we recommend that you only try this if you are comfortable with restoring the stock firmware on your device.Don't Miss: How to Restore the Stock Firmware on a Galaxy DeviceWorking on AT&T and T-Mobile. May work on Sprint. Do NOT try on Verizon variants yet.Secondly, this root method will require that you perform a factory reset on your device, so make sure to back up all important data before you get started.Beyond that, users have reported that this method does not trip the KNOX counter on the device, however it does cause Samsung Pay to stop working, which might be a deal breaker for some of you.Finally, this root method could theoretically work on all SD820 variants of the Galaxy S7 and S7 edge, but we have only confirmed it for the AT&T and T-Mobile ones. The Sprint variants have had mixed results, though you can refer to this XDA thread for workarounds for the issues it causes. As for Verizon Wireless users, we urge you to hold off on trying it out until a more stable root is available.If you are comfortable with these disclaimers, proceed at your own risk, but please be sure to read through the entire process before you take any steps to root your device.
RequirementsAT&T or T-Mobile Galaxy S7 or S7 edge (model numbers G930A, G935A, G903T, and G935T) with Snapdragon processor Windows PC USB data cable If you want to double check that you do have a Snapdragon processor, you can use a simple app to verify.
Step 1: Download Files to Your PCTo get started, there are two files you'll need to download to your PC. The first is an engineering boot image leaked from Samsung, which is what will make rooting possible later. Make sure to download the right engineering boot image for your particular model number.Download the engineering boot image for Galaxy S7 G930 models Download the engineering boot image for Galaxy S7 edge G935 models The second file is a modified version of Odin, the firmware-flashing tool for Windows, which was altered to enable the flashing of engineering boot images.Download the modified version of Odin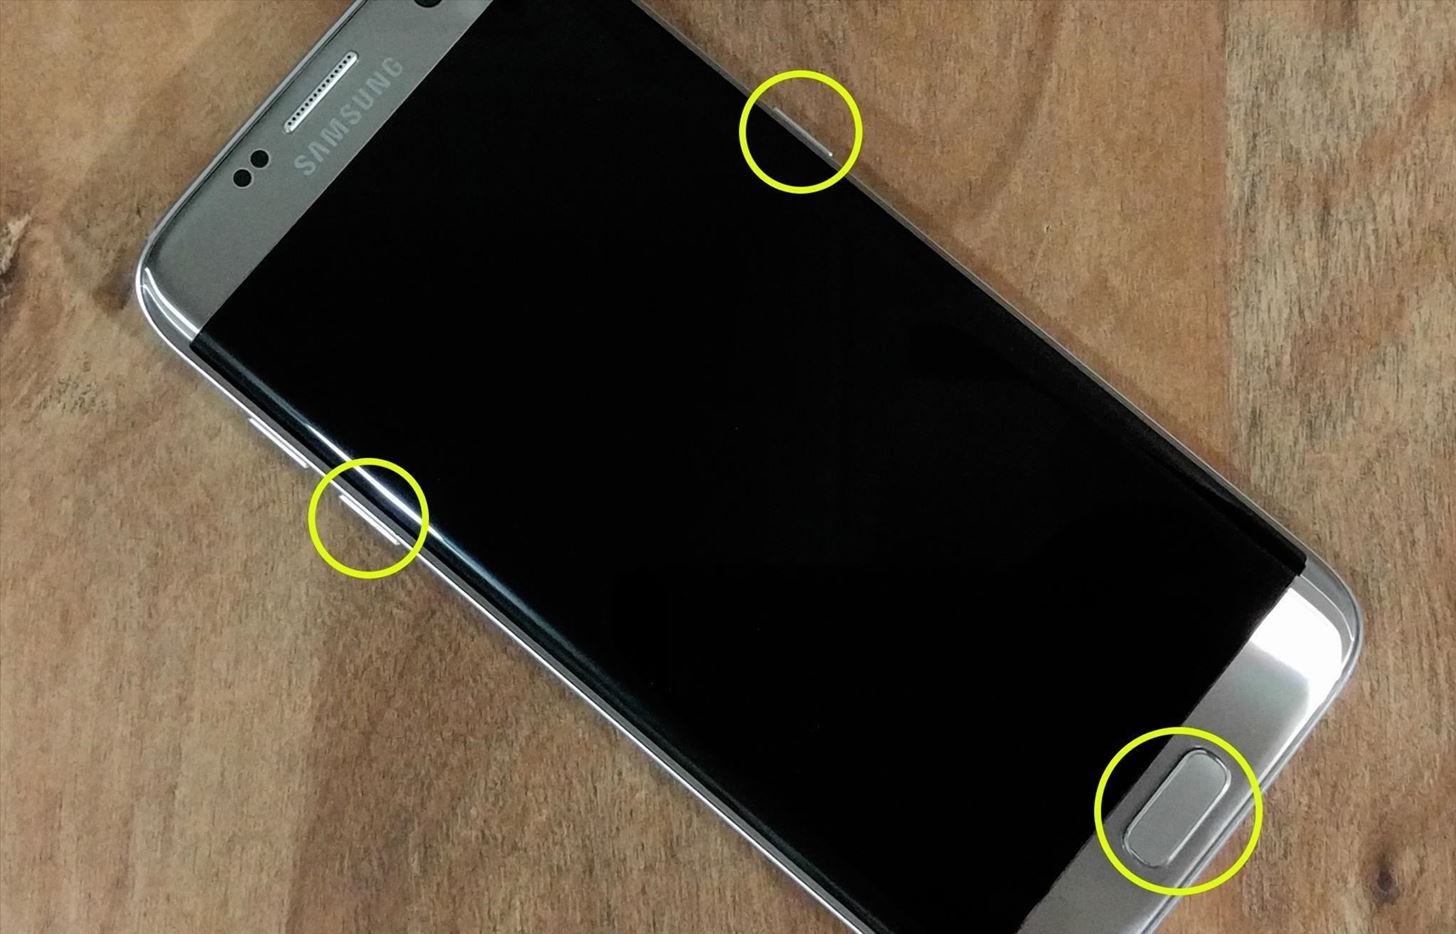
Step 2: Put Phone into Download Mode, Connect to PCNext, power your Galaxy completely off. When the screen goes black, press and hold the power, home, and volume down buttons. This will take you to Samsung's "Download mode" menu, where you'll need to press the volume up button to verify your choice. Once you've done that, plug your phone into your PC with a USB data cable. The button combination for entering Download mode.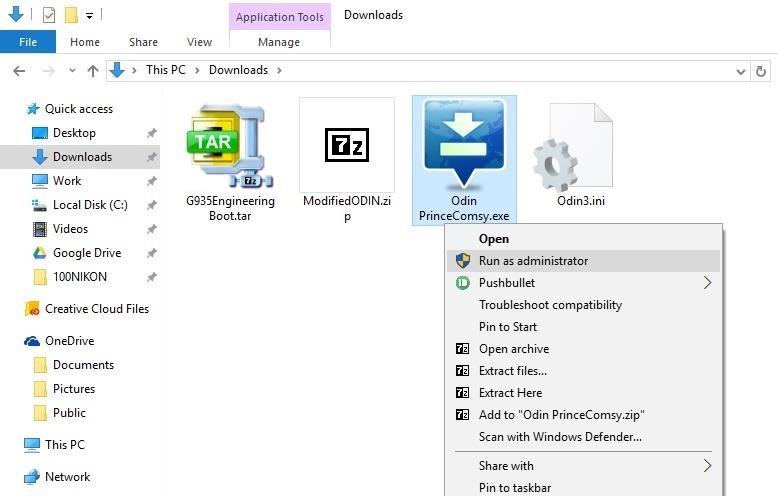
Step 3: Flash Engineering Boot Image with OdinBack on your PC now, extract the ModifiedODIN.zip file that you downloaded in Step 1. From here, right-click the OdinPrinceComsy.exe file, then choose "Run as administrator." Next, from Odin's main menu, click the "AP" button in the middle of the screen. From here, use the file browser menu to select the G93xEngineeringBoot.tar file that you downloaded earlier. At this point, just wait a few seconds until the Log tab shows a message that says "Leave CS." Once that happens, click the "Start" button at the bottom of the screen to flash the engineering boot image. The process shouldn't take very long, and when it's done, your phone will automatically reboot. When the phone reboots, you can disconnect the USB data cable.
Step 4: Perform a Factory ResetThis part's a little hard to stomach, but it's in your best interest. You could potentially get away without factory resetting your device, but the vast majority of users that didn't wipe all data have reported issues. So you could skip this step and see if it works for you, but you'll probably end up wasting a lot of time if you don't perform a full wipe.After flashing the engineering boot image with Odin, your phone will have automatically rebooted. If it successfully booted back into Android, simply power the phone off to begin. Then, when the screen goes black, press and hold the home, power, and volume up buttons to enter recovery mode.However, if your phone is stuck in a bootloop at this point, you'll have to try a different button combination. First, press and hold the power and volume down buttons simultaneously to force a reboot. Then, immediately after the screen goes black, press and hold the home, power, and volume up buttons, and you'll be taken to recovery mode.From here, use the volume buttons to highlight the "Wipe data/factory reset" option, then press the power button to select it. Next, highlight the "Yes" option, then select it to perform a factory reset. When you're done here, reboot your phone by selecting the "Reboot system now" option. This first boot will take longer than usual, so give your phone 10-15 minutes to finish booting up.
Step 5: Run Through the Initial SetupOnce you've rebooted, you'll be greeted by Android's initial setup guide. Go ahead and log in with your Google account, then finalize the setup. There's an outside chance that you may need to perform another factory reset later in the process, so you shouldn't bother with restoring apps and things of that nature just yet.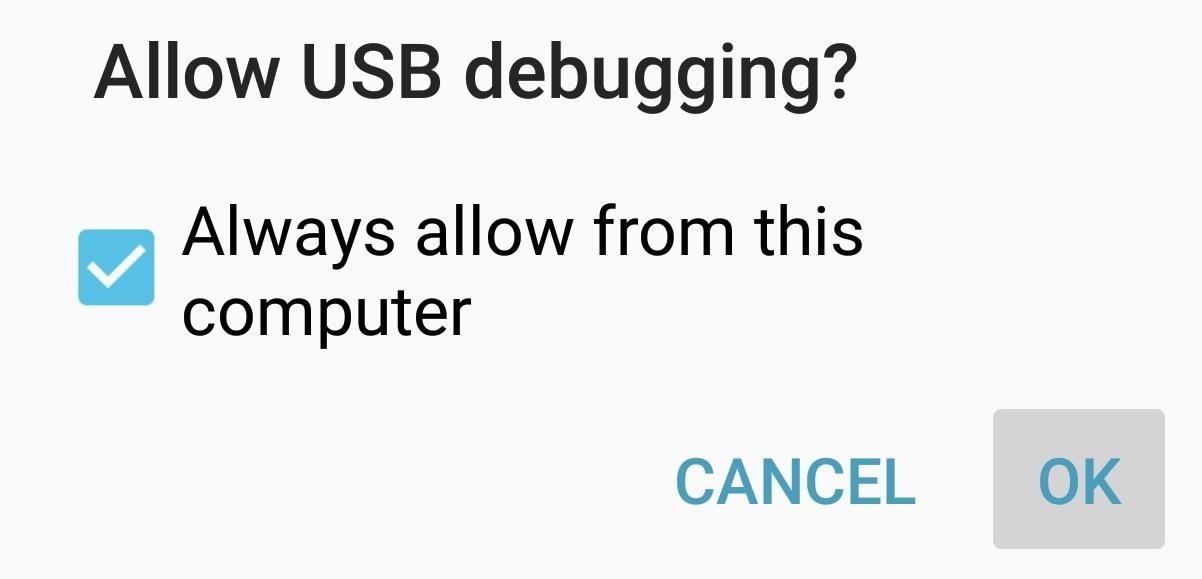
Step 6: Install ADB on Your PC, Enable USB Debugging on Your PhoneNow that you've successfully installed the engineering boot image and got Android back up and running, your phone is ready to be rooted. For this part, you'll need to install ADB on your computer, then enable USB debugging on your phone.Once you've taken care of that, connect your phone to your computer again, at which point you should see a message on your phone asking if you'd like to allow access from this computer. Tick the box next to "Always allow" on this popup, then press "OK."
Step 7: Download & Extract the Root FilesNext, you'll need to download the files that will actually root your device onto your computer, which you can snag below.Download the SuperSU root files Once you've done that, extract the contents of the ZIP, then copy them over to the platform-tools folder in your ADB installation directory. For most users, this folder will be located at C:\Program Files (x86)\Android\android-sdk\platform-tools.
Step 8: Root Your DeviceOnce you've copied the files, hold down the shift button on your keyboard, then right-click any empty space in this folder. From here, choose "Open command window here." Next, simply type root.bat into the command prompt, then press enter. You'll see quite a bit of text scrolling by as the utility roots your device, and at this point, you'll almost be ready to go.
Step 9: RebootThe root script should automatically reboot your phone when it's done, but if not, go ahead and reboot manually to finalize your work. If your device gets stuck in a bootloop at this point, you'll have to perform another factory reset, so refer back to Step 4 for instructions on that. Beyond that, it's safe to disconnect your phone from your computer at this point.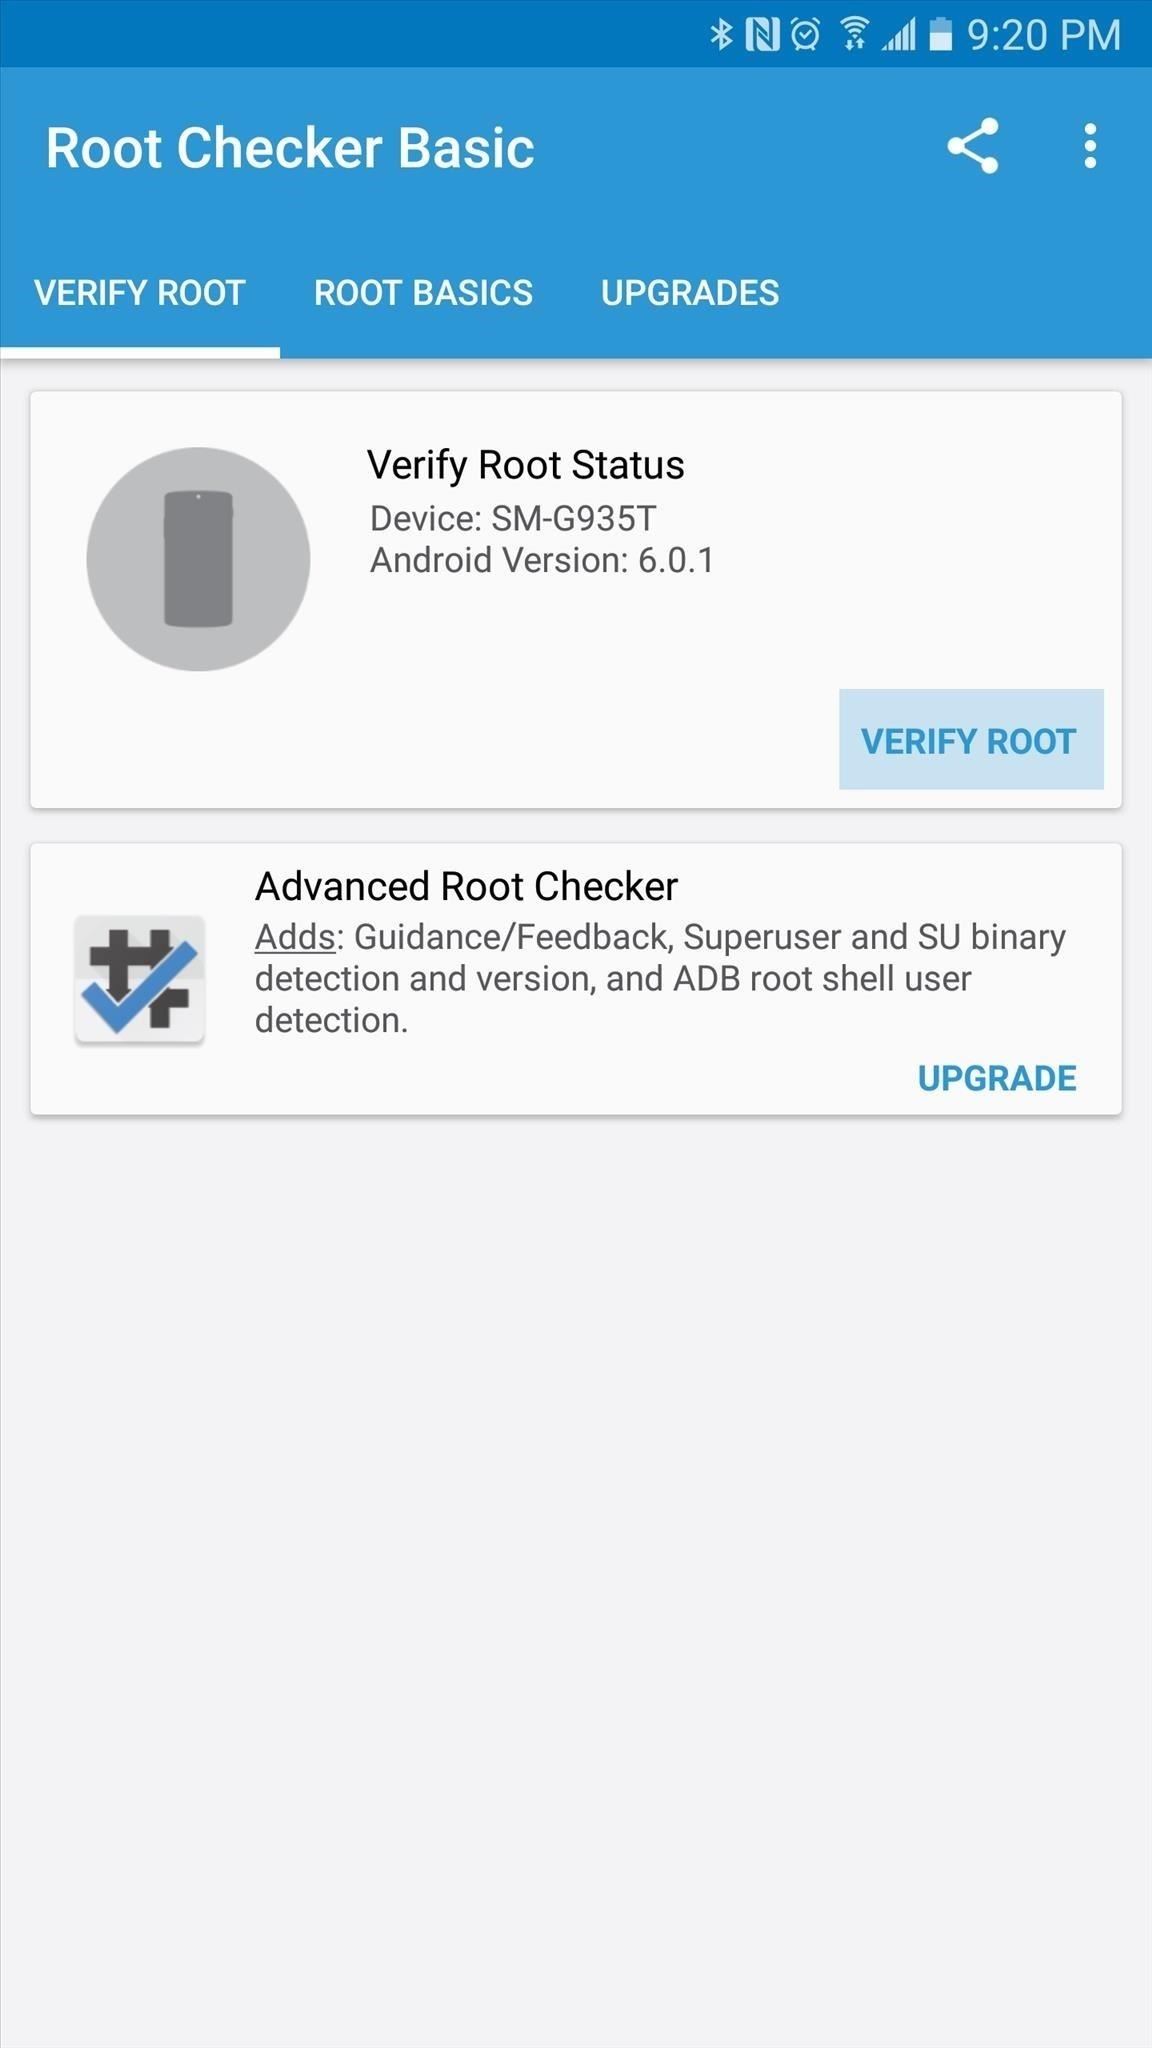
Step 10: Verify RootWhen you get back up, your device should be fully rooted. To verify this, download an app called Root Checker from developer joeykrim.Install Root Checker for free from the Google Play Store Once you've installed the app, simply open it up and tap "Verify Root." From here, tap "Grant" when prompted to give the app Superuser access, and if everything went off without a hitch, you'll see a message saying "Congratulations! Root access is properly installed on this device!"
Notes & Troubleshooting TipsAs I mentioned at the beginning, this root method has a few quirks. For starters, you should not update the Superuser binaries, even if prompted by the SuperSU app. This is because the new binaries might not be compatible with this root method.On top of that, most users have reported that Wi-Fi credentials are lost upon rebooting. If you encounter this issue, install BuildProp Editor by JRummy, then change the ro.securestorage.support=true line to ro.securestorage.support=false.Then finally, T-Mobile users will probably notice a new RCS icon in their status bar that looks a bit like a thunder cloud. If you'd like to disable this icon, you can try flashing this ZIP with FlashFire.Follow Gadget Hacks on Facebook, Twitter, Google+, and YouTube Follow Android Hacks on Facebook and Twitter Follow WonderHowTo on Facebook, Twitter, and Google+
Cover photo and screenshots by Dallas Thomas/Gadget Hacks
How to Force Reboot iPhone X, Xs, Xs Max, or iPhone XR. If you ever find your new iPhone freezing, completely unresponsive or just not running smoothly, you will be able to fix the problem (normally) by force restarting the device. Step #1. First off, press and quickly release the Volume Up button. Step #2.
How to Hard Reset iPhone XS, iPhone XS Max, or iPhone XR
Read on to learn about sharing your new theme! Tip: In your sidebar preferences, you'll find accessible themes that some people with color-blindness have found helpful. Select custom colors. To select custom colors for your Slack theme, you can type in any 6-digit HTML color value, or click a color swatch to choose from the color picker.
Slack Themes
Samsung's quick settings toggles are insanely useful for accessing settings that you would normally need to dig into menus for. Definitely a case of function over form, though. TouchWiz's bright green on dark blue has to be one of the fugliest color combinations I have ever seen.
How to Customize Quick Settings Toggles with Colors, Photos
Improve Bluetooth Audio on Your Galaxy S9 with Custom Codecs Many Samsung fans were excited when the Galaxy S9 kept the 3.5 mm headphone jack. While this is a rare delight in 2018, you also have the option for high quality audio playback over Bluetooth.
6 Hidden Audio Mods for Your Galaxy S9 : GalaxyS9
Samsung is all set to launch the Galaxy S9 and Galaxy S9+ in a new color variant. The flagship smartphones from the South Korean company have appeared in Burgundy Red color. The pictures of the
Samsung beefs up the Galaxy S9's color pallet with red and
Free Reverse Phone Lookup - SearchQuarry.com
Malware, in simple terms is nasty software that is designed intended to cause damage to your PC. Removing it can be a painful task, so we have reviewed and tested all the top antiviruses for your convenience. So can malware be removed for free? Yes, the process of malware removal can be done completely free of charge with specific software.
Free Malware Removal - Review of the Top Free Malware Removal
The best browser for your Mac is the one that comes with your Mac. Safari is faster and more energy efficient than other browsers. Handy tools help you save, find, and share your favorite sites. Built-in privacy features help keep your browsing your business. Apple Pay in Safari lets you shop safely and simply.
How to Use the New Safari Web Browser Settings in macOS High
Start your free trial to watch Star Trek: The Original Series and other popular TV shows and movies including new releases, classics, Hulu Originals, and more. It's all on Hulu.
Videos | Star Trek
Amazon Prime Day is coming. Maybe not today, maybe not tomorrow, but most likely some time in July, Amazon will be treating all its Prime customers to a day of deals. And while there may be plenty of offers worth avoiding, the best Prime Day deals do deliver big savings on some of Amazon's best
The Best Prime Day Deals 2019: What You Need to Know
Remove Or Hide iOS 10 App Icon Labels From Home Screen Without Jailbreak, Here's How By Paul Morris | November 25th, 2016 Here's a trick that allows you to remove or hide app icon labels from the iOS 10 Dock and Home screen without jailbreak to achieve a more minimalistic look on an iPhone or iPad.
How to Remove Folder Names on Your iPhone Without
Editors' Note: Updated March 8 now that the Galaxy S10 is shipping. There used to be no dispute as to which Samsung phone was the company's big-screen beast. The Galaxy Note series featured the
The Best "Made for Samsung" Apps Exclusively for Your Galaxy
0 komentar:
Posting Komentar